Introduction
This Flow Builder allows you to easily create interactive bot flows using a simple drag-and-drop interface. Follow this step-by-step guide to get started.
Overview of Interface
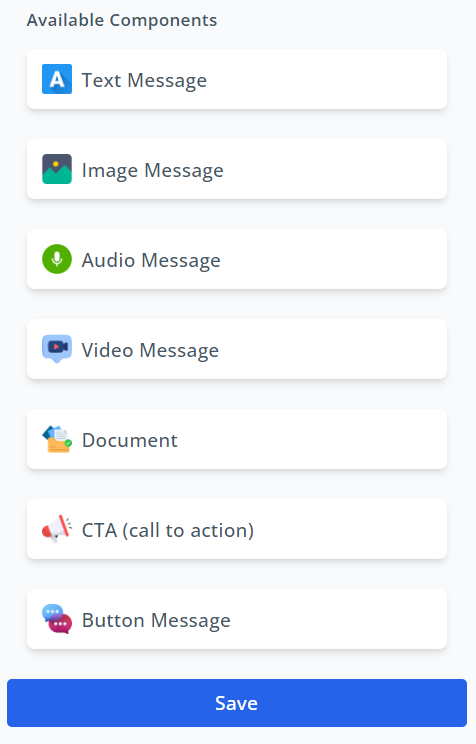
- Available Components: On the left-hand side, you will see various components that you can add to your bot flow. Components include:
- Text Message
- Image Message
- Audio Message
- Video Message
- Document
- CTA (Call to Action)
- Button Message
- Flow Canvas: The main area where you build and organize your bot flow.
- Save Button: Located at the bottom left, use this to save your bot flow.
Step-by-Step Guide
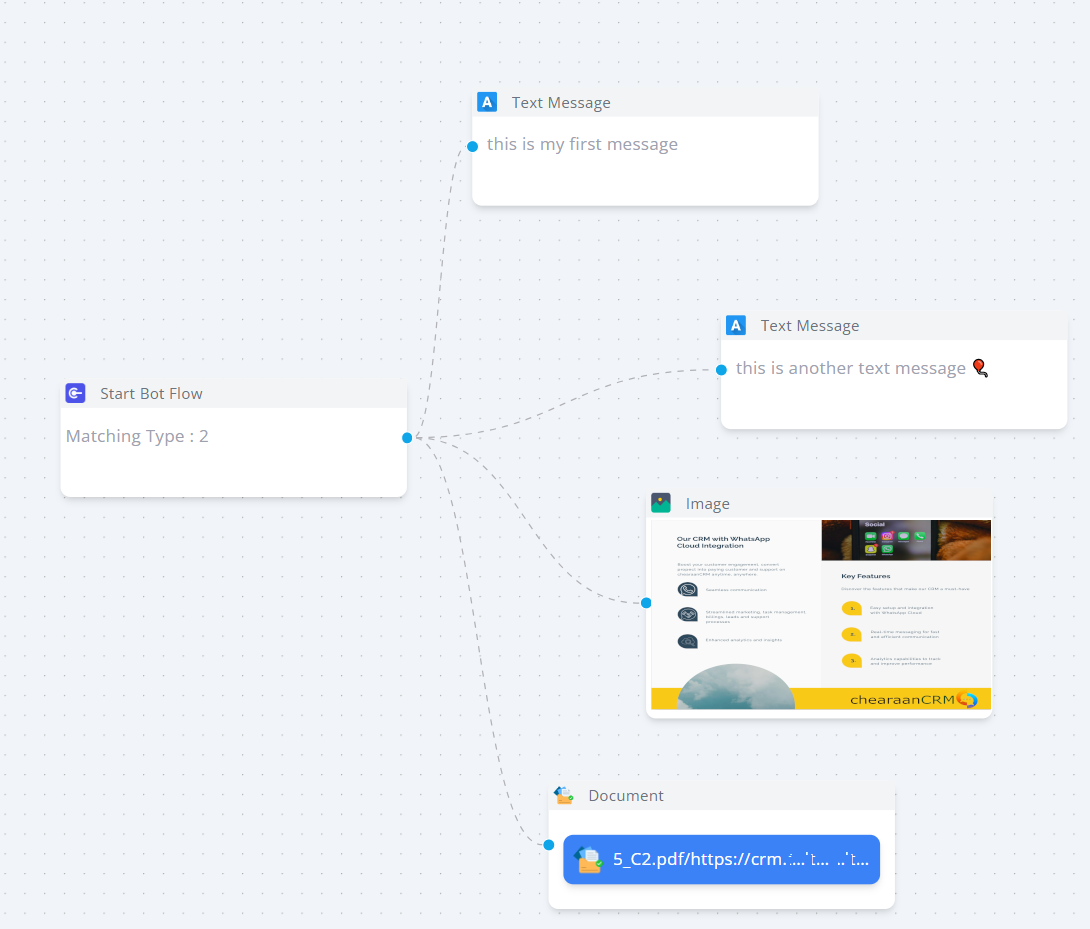
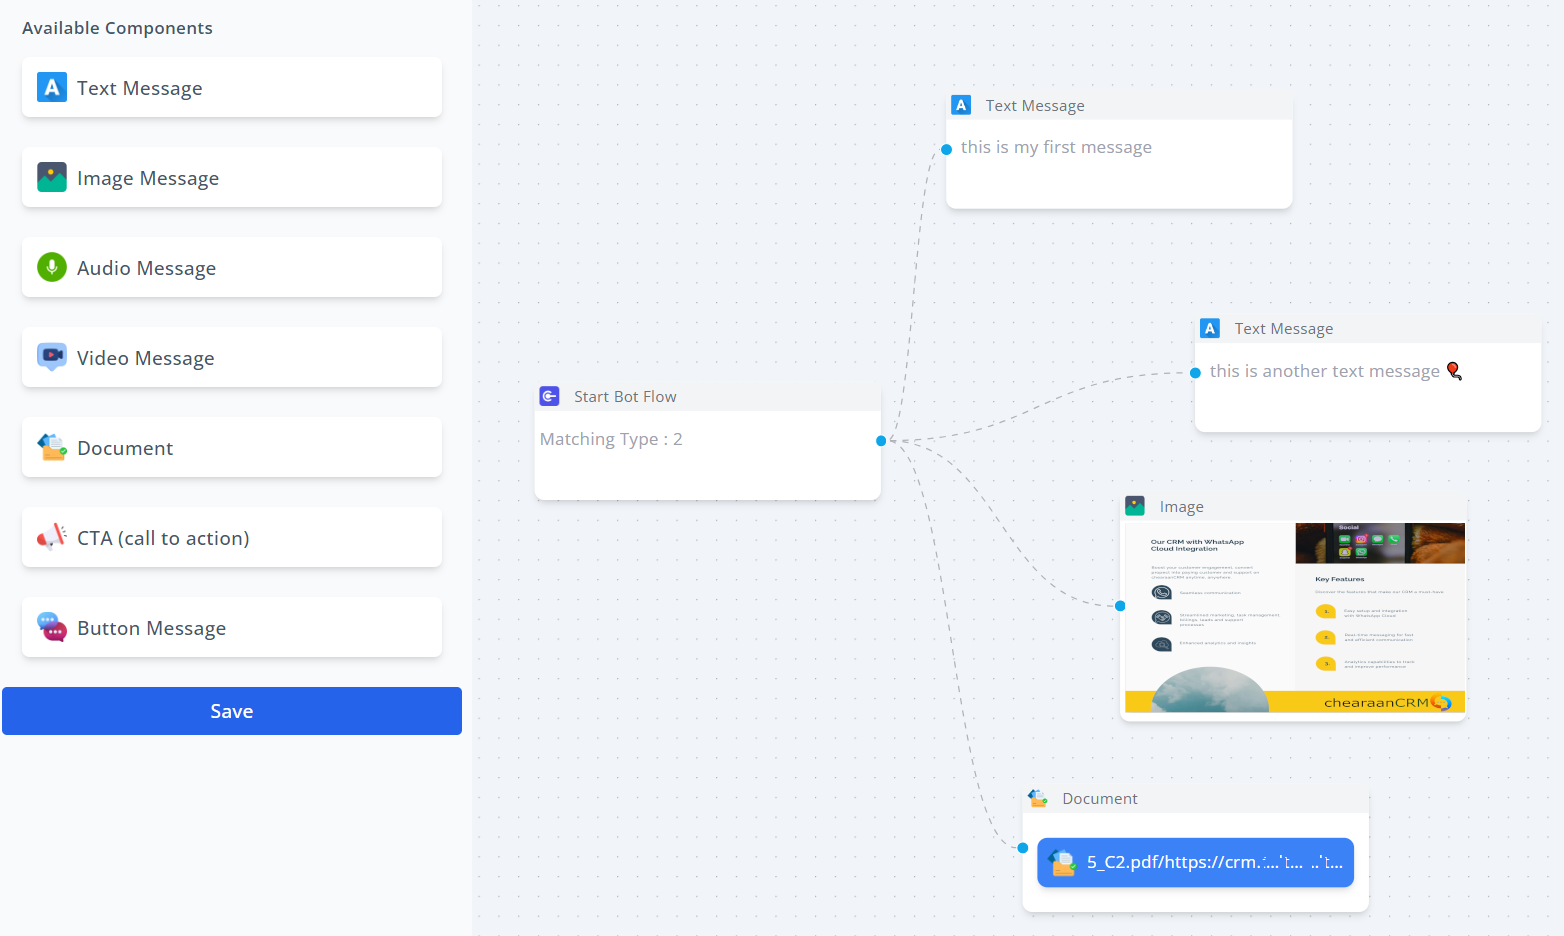
Step 1: Start a New Bot Flow
- Click on the
Start Bot Flowcomponent from the Available Components and drag it onto the Flow Canvas. - Configure the
Start Bot Flowcomponent:- Matching Type: Specify the matching type (e.g., Leads, Customer, etc.).
Step 2: Add Text Messages
- Drag the
Text Messagecomponent from the Available Components to the Flow Canvas. - Customize the text message:
- Input your message in the provided text field.
- Connect the
Start Bot Flowto theText Messageby drawing a connecting line from the blue dot ofStart Bot Flowto the blue dot ofText Message.
Step 3: Add Images
- Drag the
Image Messagecomponent onto the Flow Canvas. - Upload or select your image and any accompanying text.
- Link the
Text Messageto theImage Messageby drawing a line between their blue dots.
Step 4: Add Call-to-Action (CTA)
- Drag the
CTA (Call to Action)component onto the Flow Canvas. - Configure the CTA component:
- Header Text: Add the header text.
- Header Value: Provide the value or description for the header.
- Link 1: Add the link for the CTA.
- Footer Text: Add any footer text.
- Connect the
Image Messageto theCTAby drawing a line between their blue dots.
Step 5: Add Additional Components
- Continue adding other components like:
Button Message: Adding interactive buttonsAudio Message: Incorporate audio messagesVideo Message: Embed videosDocument: Attach documents
- Link each component sequentially as per your bot flow logic, ensuring that all components are connected via the blue dots.
Step 6: Review and Save
- Review your bot flow on the canvas to ensure all components are properly linked.
- Click the
Savebutton on the left-hand side to save your bot flow.